Kelsall Lake

Looking for a bit of fun and adventure finds Angela and I heading north out of town and up into the high country to parts unknown. We packed the truck with bicycles, packrafts, hiking paraphernalia and some snacks. About halfway up Marinka’s Hill, we stop to gawk at the Northern Takhinsha/Southern Alsek’s baring their blue and stoney ice in the spectacular late summer light. I have never seen these peaks so devoid of the previous winter’s snow. The result is visually striking; the glaciers are on full display and the rocky summits piercing the deep blue hue above. Once past Three Guardsmen, it is decided a paddle across the mystical Kelsall Lake is in order, and soon we are bouncing the truck down the 4WD track to it’s shores.

Once in the water, a pleasant paddle two or three miles to the inlet stream that feeds the lake comes around and we stop for lunch and a swim on the sandy beach below the glacier of Kelsall Peak. Back in the boats, a great wind swells up and we fight the lateral rollers all the way back to the truck and happily scurry back over The Pass and head back home.

Kelsall Lake-1
Takhinsh/Alsek Range
Kelsall Lake-2
Bare Ice
Kelsall Lake-3
Happy To Call This Place My Home…
Kelsall Lake-4
Mountain Hemlock

Kelsall Lake-5

Kelsall Lake-6
Getting Boats Prepped
Kelsall Lake-7
The Enchanting Kelsall Lake
Kelsall Lake-8
Kelsall Peak and Glacier

Kelsall Lake-9Kelsall Lake-10Kelsall Lake-11Kelsall Lake-12Kelsall Lake-13

Kelsall Lake-14
Angela Fires Down A Burrito

Kelsall Lake-15Kelsall Lake-17Kelsall Lake-19

Kelsall Lake-20
Brrrrr…

The Revolution I

Sometime back, I purchased an overpriced piece of electronic gadgetry to transform Dyno Hub power into 5.5 Volt USB power to keep cell phone and Ipod charged while on long bicycle adventures. The item in question was called “The Plug”. It was made in Germany, was overpriced, and had the ridiculous design protocol that required it to become a permanent part of one’s bicycle. This was not OK.. I redesigned “The Plug” to fit in an external casing and could then be utilized anywhere or on any bike. It was, however, extremely heavy and bulky. A short while ago the guys at Bright Bike Labs sent me a product called the “Revolution “. It is a product they came up with to provide the same thing that The Plug offers.. at half the price and a quarter of the weight (after my conversion). I have now mounted it to the Ogre and have removed the supertanker known to me as The Plug. It is light, simple, and most importantly, it works!  I will be leaving next week on a 4000 + mile pedal through The Yukon, Alaska, and the Northwest Territories, and will be relying on the Bright Bike Revolution to provide me with a fully charged Ipod and Cell phone at all times. After some miles, I will be reposting on the Revolution for an update on it’s perfomance, so check back!

Revolution II Revolution I Revolution III

Trying to get Ready..

Yes, I am trying to get ready to leave for Alaska. I mean, besides working, riding bikes, tying up loose ends, handling predetermined obligations, doing maintenance on the truck, doing research, creating itineraries for both myself and for Angela, studying maps, altering and customizing gear and equipment, experimenting with gear ratios, gathering phone numbers and addresses, creating equipment lists, and last but not least, trying to get fit.

Besides these things, I am trying to get my head around this trip. It is a task easier said than done, and here’s why:  Big trips are no stranger to me; I’ve been on plenty. Here’s another one, no big deal, right?  In the past, generally speaking, I have lived, primarily, in areas where I would consider the landscape, the people, the mentality, and the environment to be somewhat easy on me; meaning that it had always been conducive to promoting health, fitness, and relaxation, all the while allowing me to pursue athletic activities that kept my mind and my body sharp for such adventures and expeditions.  I have been, recently and currently, in the city now for 19 consecutive months. That is far longer than a person like me should ever have to be in the city. I don’t do well in said places. In the past, embarking on trips such as these has been a relatively simple affair, since my mind and body were already tuned for these notions. Here and now, it is far different.  I feel like europe might have felt in 1946, ragged and weak, yet placing one foot in front of the other in an attempt to move forward with it’s goals. Bear in mind this is only an analogy, and I do not place any amount of lightness on what Europe must have endured during the decade following WWII, as I was not there and hopefully will never experience the sort of suffering those people went through. I am merely attempting to demonstrate my own state of mind after planning another “big” trip after living in the city for 19 months straight!  That’s all.

The closer I get to the departure date, the more together I feel, ironically enough. May 6th, that is now the date. I am going to drive to Mt Shasta, and hopefully, meet up with my old time friend, Dennis Belillo, for a stomp up the old peak for a bit of excersise and good times. Then off to Bellingham to see my friend Ben Hainie, and then on the ferry to Skagway on the 17th.

I loaded up the bike yesterday for a fully loaded (the bike, not me) pedal around the area.

It must have weighed in at 150 lbs. That’s with food and water. Too much? Yes, probabely so, but so it is… Only 25 more days.

Fully Loded

“The Plug II” Made Better

%22The Plug%22 Case

A while back, I posted a photo of an upgrade to the USB/Dyno Hub charger “The Plug”. It was a case made to allow use of “The Plug” without a complicated and permanent install on the bicycle. It allowed the freedom to swap from bike to bike. It was crudely made from copper, PVC, and silicone. I have now created an upgrade to the upgrade by creating an all copper version that has been sweated together with silver and then sanded to give it a smooth feel. It is a clean looking unit now, that is solid and functional. I will be selling these to anyone who may want one in order to help finance this blog and the adventures it contains.

If you are interested in one, please send me:

1. The Plug

2. The wiring

3. The proprietary star nut adapter to allow the wiring to pass thru the unit

4. The wiring fitting that came with your dyno hub

5. 40 bucks-includes shipping

6. Leave a message here or email me and we can work out the details.

$ 40.00 gets you the plug case with the plug installed and wired, plus return shipping.

The Rivet Pearl

IMG_8023Like many other cyclists, over the years I have ridden and experienced many different saddles on many different bicycles; sometimes connected to seat posts with varying degrees of setback, length, and stiffness. The vast variety of sensations these experiences created, allowed me to know the difference between what I consider to be a poor saddle,  a good saddle, or even a great saddle.

I have been riding Brooks saddles with a great amount of success for quite a long run. Some time back, I purchased an outstanding B17 Select. This is an upgrade from the standard, featuring thicker leather and hand pounded rivets. Alas, the Salsa Fargo that it was affixed to was stolen, and that was that. When I built my Surly Ogre, I replaced it with an “identical” saddle, paying a full retail value of 200 bucks for another B17 Select. At first glance, this baby seemed exact. A week later, after maybe 200 miles, the saddle looked as tho it had been mounted to the bike for thirty years, and was soft like an old pair of work gloves. Brookes gave me an RA number, but the thought of going through the hassle was more than I could bear; I put the saddle on another commuter, and began looking for a non Brooks alternative…

…Enter Rivet Cycle Works.  While at the bike shop, wrenching away one fine afternoon, Debra Banks, owner and proprietor of said company, and I, struck up a conversation. Debra was there to show some of her new saddles to John Boyer/Edible Pedal. After hearing of my Brooks woes, she handed me her solution in the form of the Rivet Pearl Saddle. It featured leather that one dreams about on a saddle, thick and uncompromising, yet with the ability to become a supple pillow for one’s arse over time. It also features a cutout on the top to allow pressure to be alleviated from said anatomy. The sides of the unit, unlike a Brooks, are folded under the saddle, and riveted in place to a nice stainless plate that you can see through the saddle’s cut out. This prevents the saddle from “splaying” outward. The thought behind this is that a splayed saddle will eventually chaffe the legs and groin. A nice feature I believe. However, the riveted underbelly, and it’s ensuing cause and effect, make this saddle seem a bit narrower than something fairly wide like, say the B17 or a Velo Orange touring saddle. This gives the saddle a nice, slim, low profile feeling that most will enjoy. Honestly, it felt a bit like a Brooks Pro, but more comfortable. Furthermore, it also features Ti rails that are much longer, and therefore have more adjustability than a Brooks, A VO, or a Cardiff.

The saddle is light too; at 460 grams for the Ti version, The Pearl is light enough to go on any bike where comfort is king. Rivet also makes a chromoly version for less money and more weight. The saddle I have is an Au Natural- plain leather. It is a look that I desire, and it is starting to turn a nice deep color that is an indication of the saddle approaching it’s sweet spot in regards to being broke-in. Apparently, these saddles also come in black, burgundy, and white. Rivet claims that the colored models need no leather treatment, as the dying process waterproofs them adequately. They recommend treating the Au Natural version, but, personally, I have never been fan of treating saddles. I am however, a fan of fenders and saddle covers for riding in the rain.

After 600 miles of riding on the Rivet Pearl, I can now say this: It is light, medium feeling in width, firm, yet supple feeling, and made with the best looking leather I have seen on a saddle in years. If you are looking for a durable, yet comfortable saddle alternative to the usual suspects, the Rivet is definitely worth a look. You can see and test one in person at Edible Pedal in Sacramento.

IMG_8024

Grand Cru Sabot Pedals

Platform pedals, to me have always been the most realistic way to pedal a bicycle around. Call me crazy, some do, I admit, but a good platform allows one the freedom to wear any type of footwear over any terrain, and have the ability to utilize the same given footwear in double duty to hike, swim, or simply hang out or kick back. A good platform is comfortable as well.

I have gone through, over the years, many types of platforms, from cheapy, entry level DH pedals, to boutique, high dollar ones. All of them had either a combination of bearings and bushings, or some merely had bearings alone. All of them developed into gritty, heinous feeling instruments after a period of usage, which, either rendered them useless, or required a tedious rebuild, which only prolonged their destiny to the junk pedal box.

I recently ordered a pair of the outstanding Grand Cru Sabot Pedals from Velo Orange.. These sole saviors come with not two, but three sealed cartridge bearings for optimal smoothness and ease of replacement. Honestly, I’m quite certain I have never felt a smoother pedal. At 90 frog skins a pop, these suckers obviously fit squarely into the high dollar boutique category. Good stuff costs money. Bad stuff costs even more.

The finish on these are impeccable, they come with an extra set of pins, and there are easy accommodations for toe clips, if that is your bag. I personally like a half clip just to keep my feet on the deck while riding in the rain, which is often. I’m not so concerned with the upward pull that so many clipless enthusiasts seem to desire.. I find a free floating rhythm and just pedal.  I Always have…  These are my new fave’s.

Gran Cru Sabot


Grand Cru Sabot Pedals

Not Saddle Sore

IMG_8023
The Rivet Pearl…
IMG_8024
..with Ti Rails!

I’d rather be riding my bike today.. but, well, it’s raining. I know what you’re thinking; how can someone who raves endlessly about all matters northern, about how riding in the rain does not bother, about the “glorious” weather of SE Alaska, simply whine about a simple California drizzle.  Well, for starters, the trails I had in mind to ride today are going to be muddy. In fact, the trails I was going to ride today are in fact illegal. By riding on muddy and illegal trails, I set the stage for prosecution and closure by creating said muddy tracks.

Also, part of the reason for going on a ride today was to test out the new, famously good looking Rivet Pearl saddle, that was graciously given to me for such purposes by the fine folks at Rivet Cycle Works.  As soon as I get the chance to do some vigorous thrashing on this beauty, I will be posting a review, so keep Yer eyes peeled.

So, my time spent in the hours before heading to the bike shop to work will be filled with coffee and hopefully something interesting to say to you all.

Here goes…

I struggle as a writer, struggle as photographer, struggle as an adventurer, insofar as creating the means to do so. I fear not the “talent”, or the creative processes that are required for my sanity, or to paint a beautiful picture of the natural elements of this splendid planet.. I feel soo lucky to have been born here. This globe is beautiful beyond wordly description; that is why I must do what I do. The far reaches of this planet’s wilderness are my calling. This can cost a lot. Financially, yes, but this not what my voice speaks. These places come as a cost in regards to how one can handle the pressures of our given society and how one perceives self and how, not to behold, the “values” that we have been so engrained in believing. Why must we live the way most do? Can it be “acceptable”, by one’s family and peers, to embrace the beauty of the planet before us, to, perhaps, live as our ancestors did, to love all creatures, wether or not they are located in the food chain above us or not. To see and to feel the wind; to be there at that moment in time?

These are the questions and reasonings I behold, not to stroke an ego of self in regards to media or self promotion, but to truly empower one’s self as a Human; a human lost on a planet ruled by a species gone mad.

On certain terms, the living in a  city has been good for me. It has re-shown me the path that we ALL are on and the one that I must follow.  To recognize the destructiveness of our behavior.

I tend to “think” with my heart; my brain merely functions as a overseer to what needs to happen at a given moment in order to accomplish a task at hand, and nothing more. Heart is what guides.

What gets you off most: the thought of the new iphone 5 coming out, or what your heart might feel sitting or walking or riding a bicycle through hours of the most torrential rain storm in recent memory? Can you smell the odor of the trees coming alive with quench of the moisture, or do you merely quander at the thought of what your peers may think of your latest achievement? These are genuine questions that beckon the prose: Am I here to fully realize and experience the whole  of what we really have to offer one another and the planet as a whole, or are we here to simply entertain ourselves through the current form of technology?

I think not.

Gear – Part I: Powering Up

60D

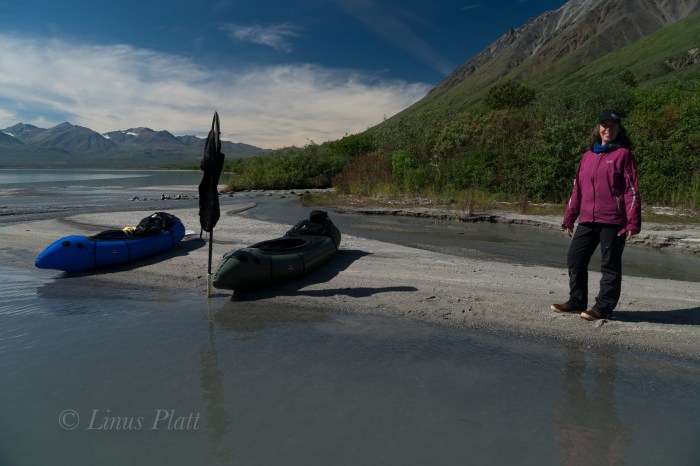
Being the sort person that thrives on being out on extended adventures in remote places as wells  having the utmost desire to be as completely self contained as possible, and also being of the the sort who needs to utilize a certain degree of technology in order to accomplish my mission as a photographer, I thought I’d share some of that technology here.

IMG_7237

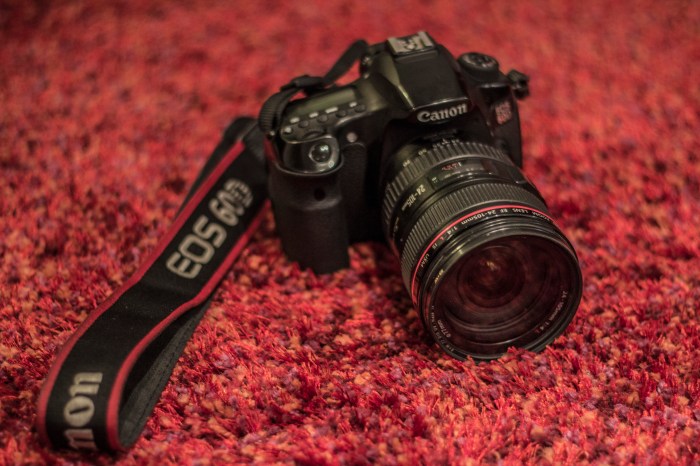
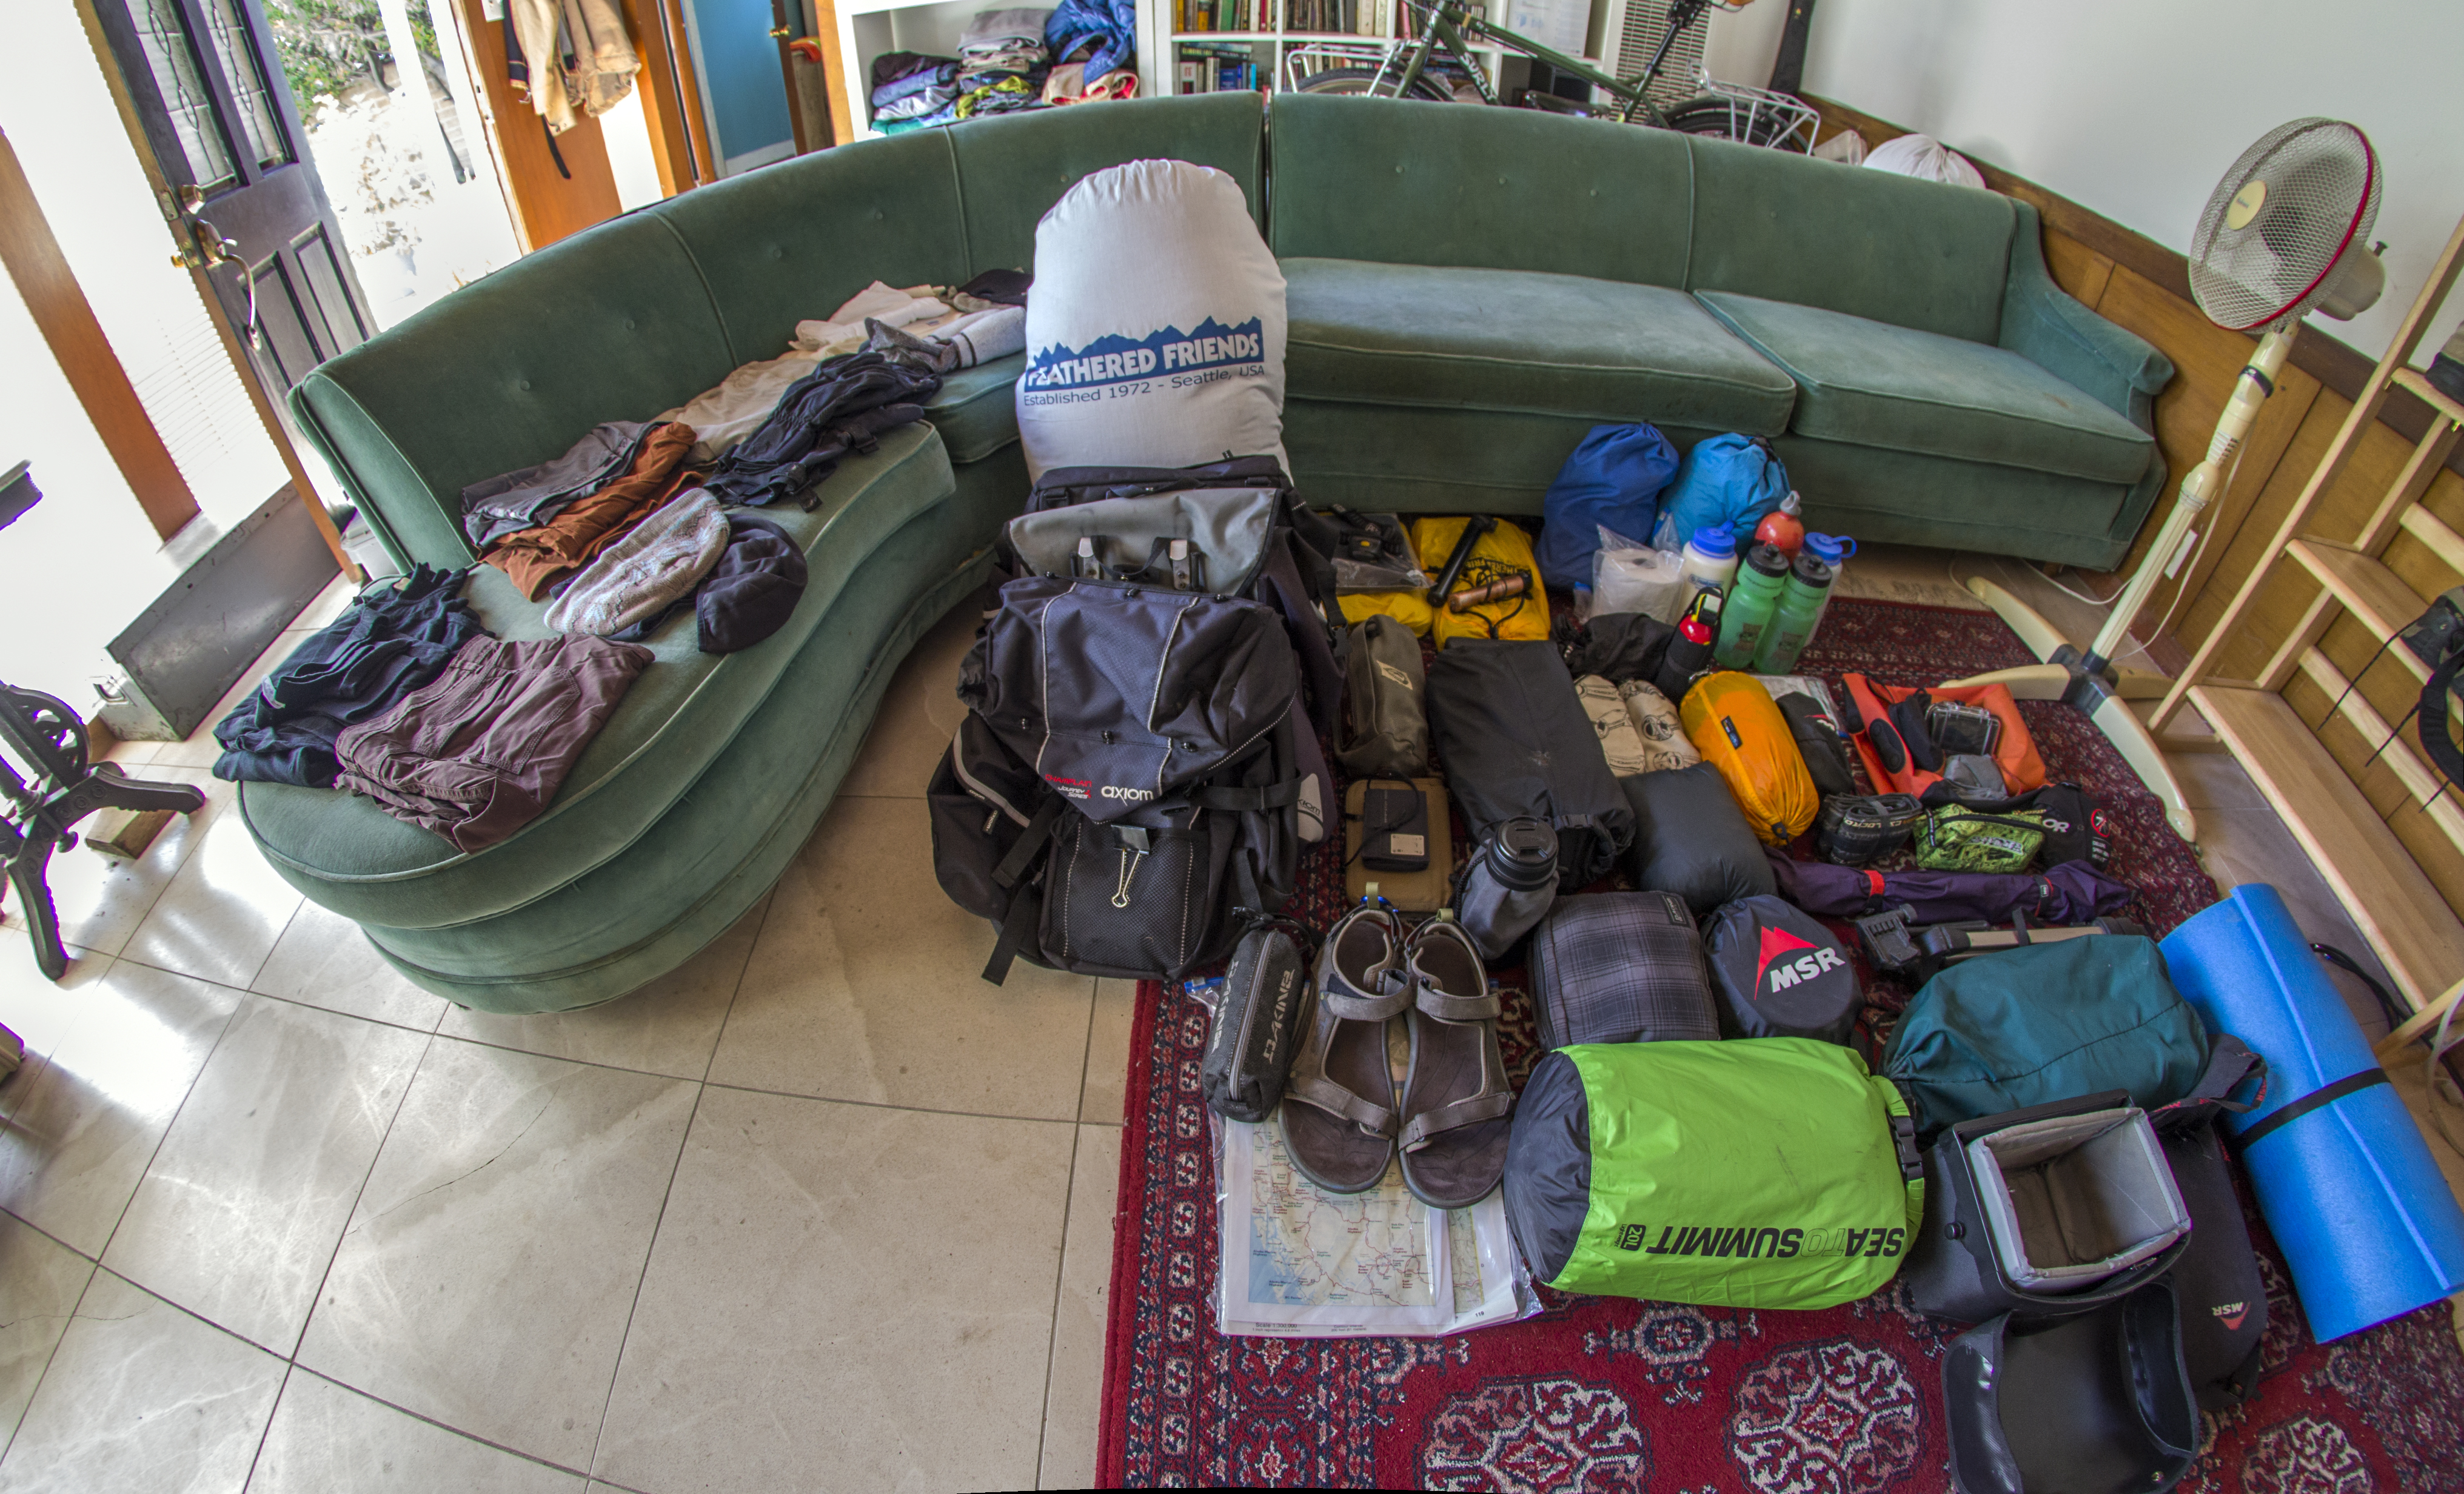
I tend to, on long road-worthy bike trips, carry what I need. In other words, on extended trips that are not intended on “light and fast”, I don’t go light, generally speaking.  That said, I carry a heavy Canon 60D DSLR, a 24-105mm lens, a 10mm super wide/fisheye lens, an intervalmometer, 3 camera batteries, a tripod, a 12 volt Canon charger, 2 hard drives, a laptop, an ipod, and a basic cell phone.  Holy shit that’s a lot of junk to be hauling into the woods!   Word.

Keeping things charged and protected can be a real pain in the arse on long trips into remote areas. Especially when you may be encountering a certain degree of discomfort or hardship; day after day of rain, grueling hill climbs, lack of food or water, mechanical breakdowns, or the threat of predatory animals in the area you might be in. These types of circumstances make it difficult to be motivated enough to put the effort in that may be needed to keep those DSLR batteries charged or the Laptop fired up to offload photos and back things up.

I have put a bit of thought into how to make this as easy as possible, while maintaining my own set of rules regarding self reliance.

IMG_7229

IMG_7238

The Apple MacBook Air 11″ is the smallest, lightest, most powerful unit in it’s class on the market. Being a non PC user, this is simply the ticket. The model I have is an older one; intentionally sought out in order to run Mac OSX Snow Leopard (my top choice in order to run Final Cut Pro 7 properly for video editing). It has a1.6ghz processor and 1g of RAM.. not much, but just enough to get the job done in the field. As a bonus, it has no optical drive and has a solid state HD, which means NO MOVING PARTS!

To offload photos, I have choices:  I carry a Nexto Extreme 500G HD that requires NO COMPUTER to operate. It has a button menu, it’s own battery, SD and CF card slots, and will offload your cards to it’s HD, and then give you a confirmation!  Then, depending on how much spare time I’ve had recently and how much the sun has been shining for photovoltaics, I can then choose to use the Laptop to back up this drive to another external drive. The one I have is a Toshiba USB model with 1TB storage.

IMG_7231

IMG_7233

Now, the solar panel I have is a beast… The one I used to carry was a Brunton 26 watt unit that was small and light, but it was always a problem keeping ipods and camera batts charged. This was back when I didn’t carry a laptop to back photos up. It was risky business in regards to my photos to say the least.

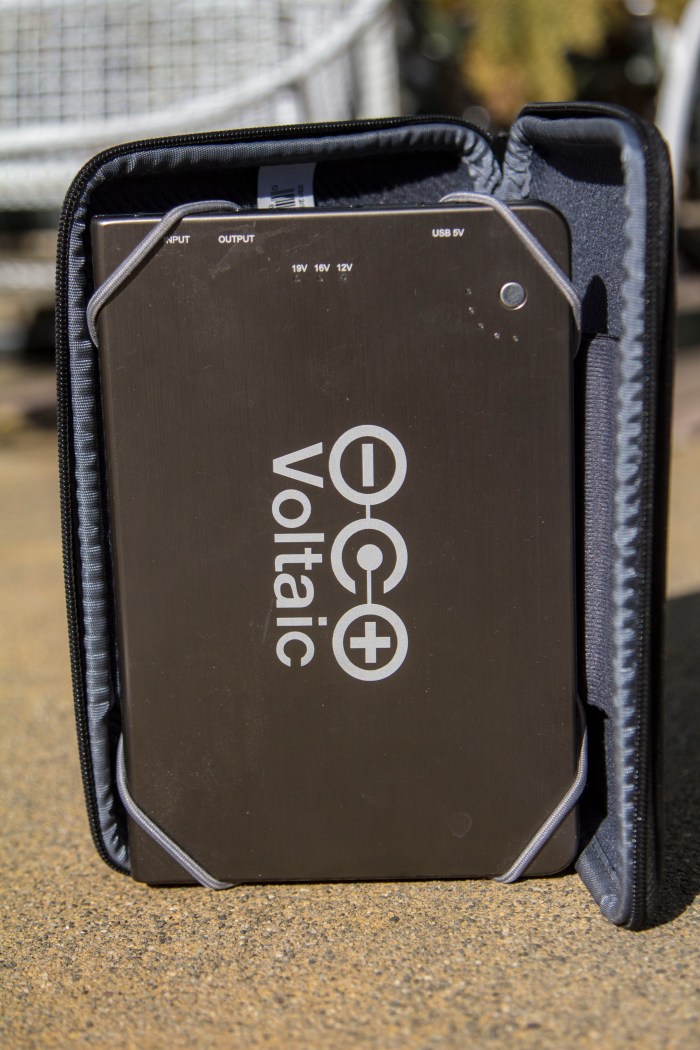
I now have a PowerFIlm 50 watt monster… It connects to a Voltaic 60 watt multi voltage battery. The entire package is certainly heavy; no one ever said that doing this stuff on yer own, way, way out for extended periods of time was going to be easy, did they?

IMG_7240

The battery can connect to the panel with a long cord, so as to be in the tent at camp, while the panel is out there doing it’s job.  There is a switch on the Voltaic to select voltages as 12v, 16v, or 19v, depending on your laptop needs. A full sized MacBook Pro would use the 19v setting, but the MacBook Air uses the 14v setting. I use the 12v setting to plug in my Canon LP-E6 car charger for the 60D batteries. Voltaic will even, for just a couple of more bucks, supply you with an in house-made adapter for the mag-safe on apple laptops, which will, in turn, connect to the Voltaic battery. Sweet!  The voltaic unit also has a USB port to run your phone, ipod, etc. I use tent stakes to lay out the panel in camp, run the long cord to the tent, and all gets charged, assuming there is sun.

For the majority of my USB charging needs (Nexto unit, ipod, basic cell phone)  I have devised a system that was not too easy to set up, but now that it is up and running, it works like a charm.

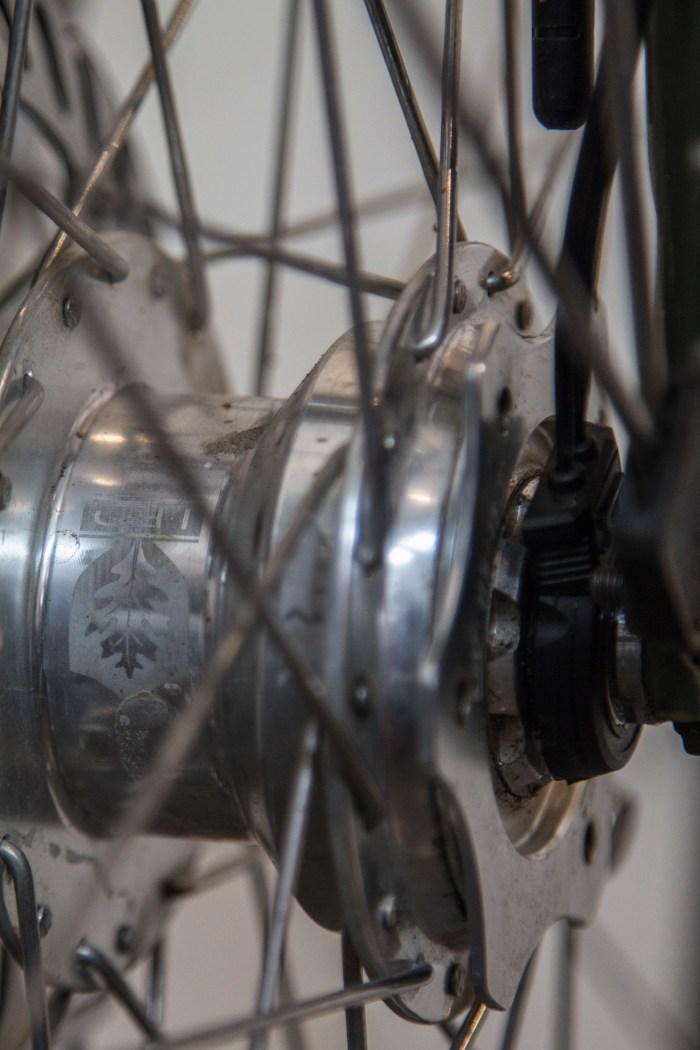
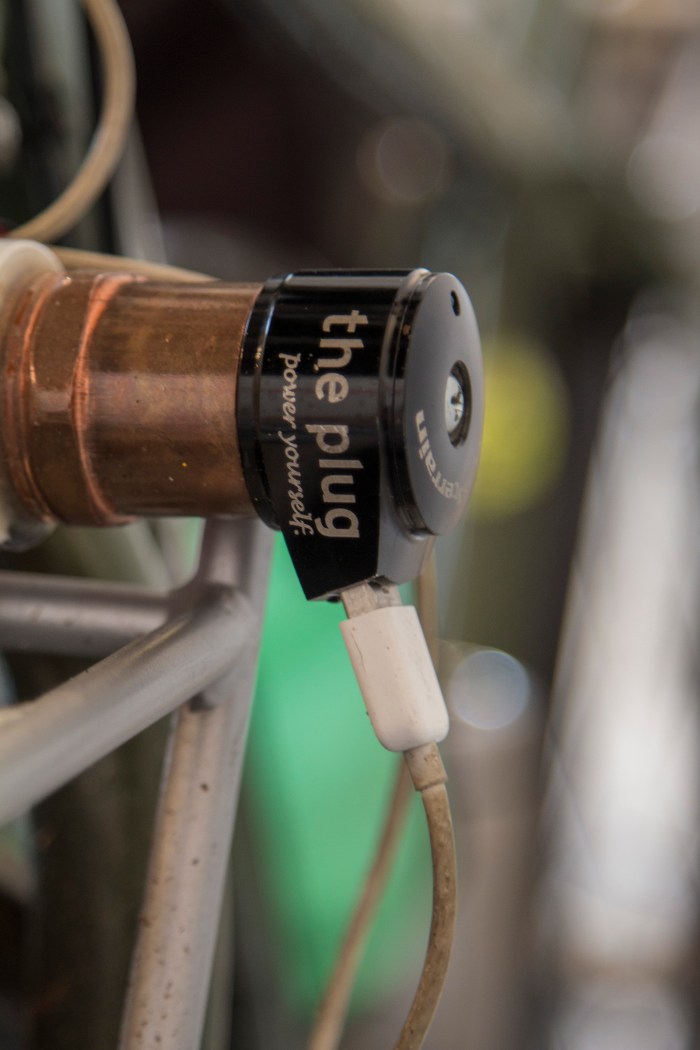
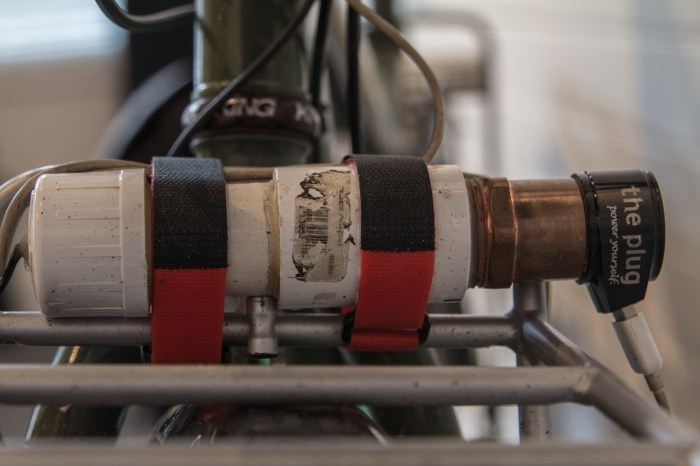
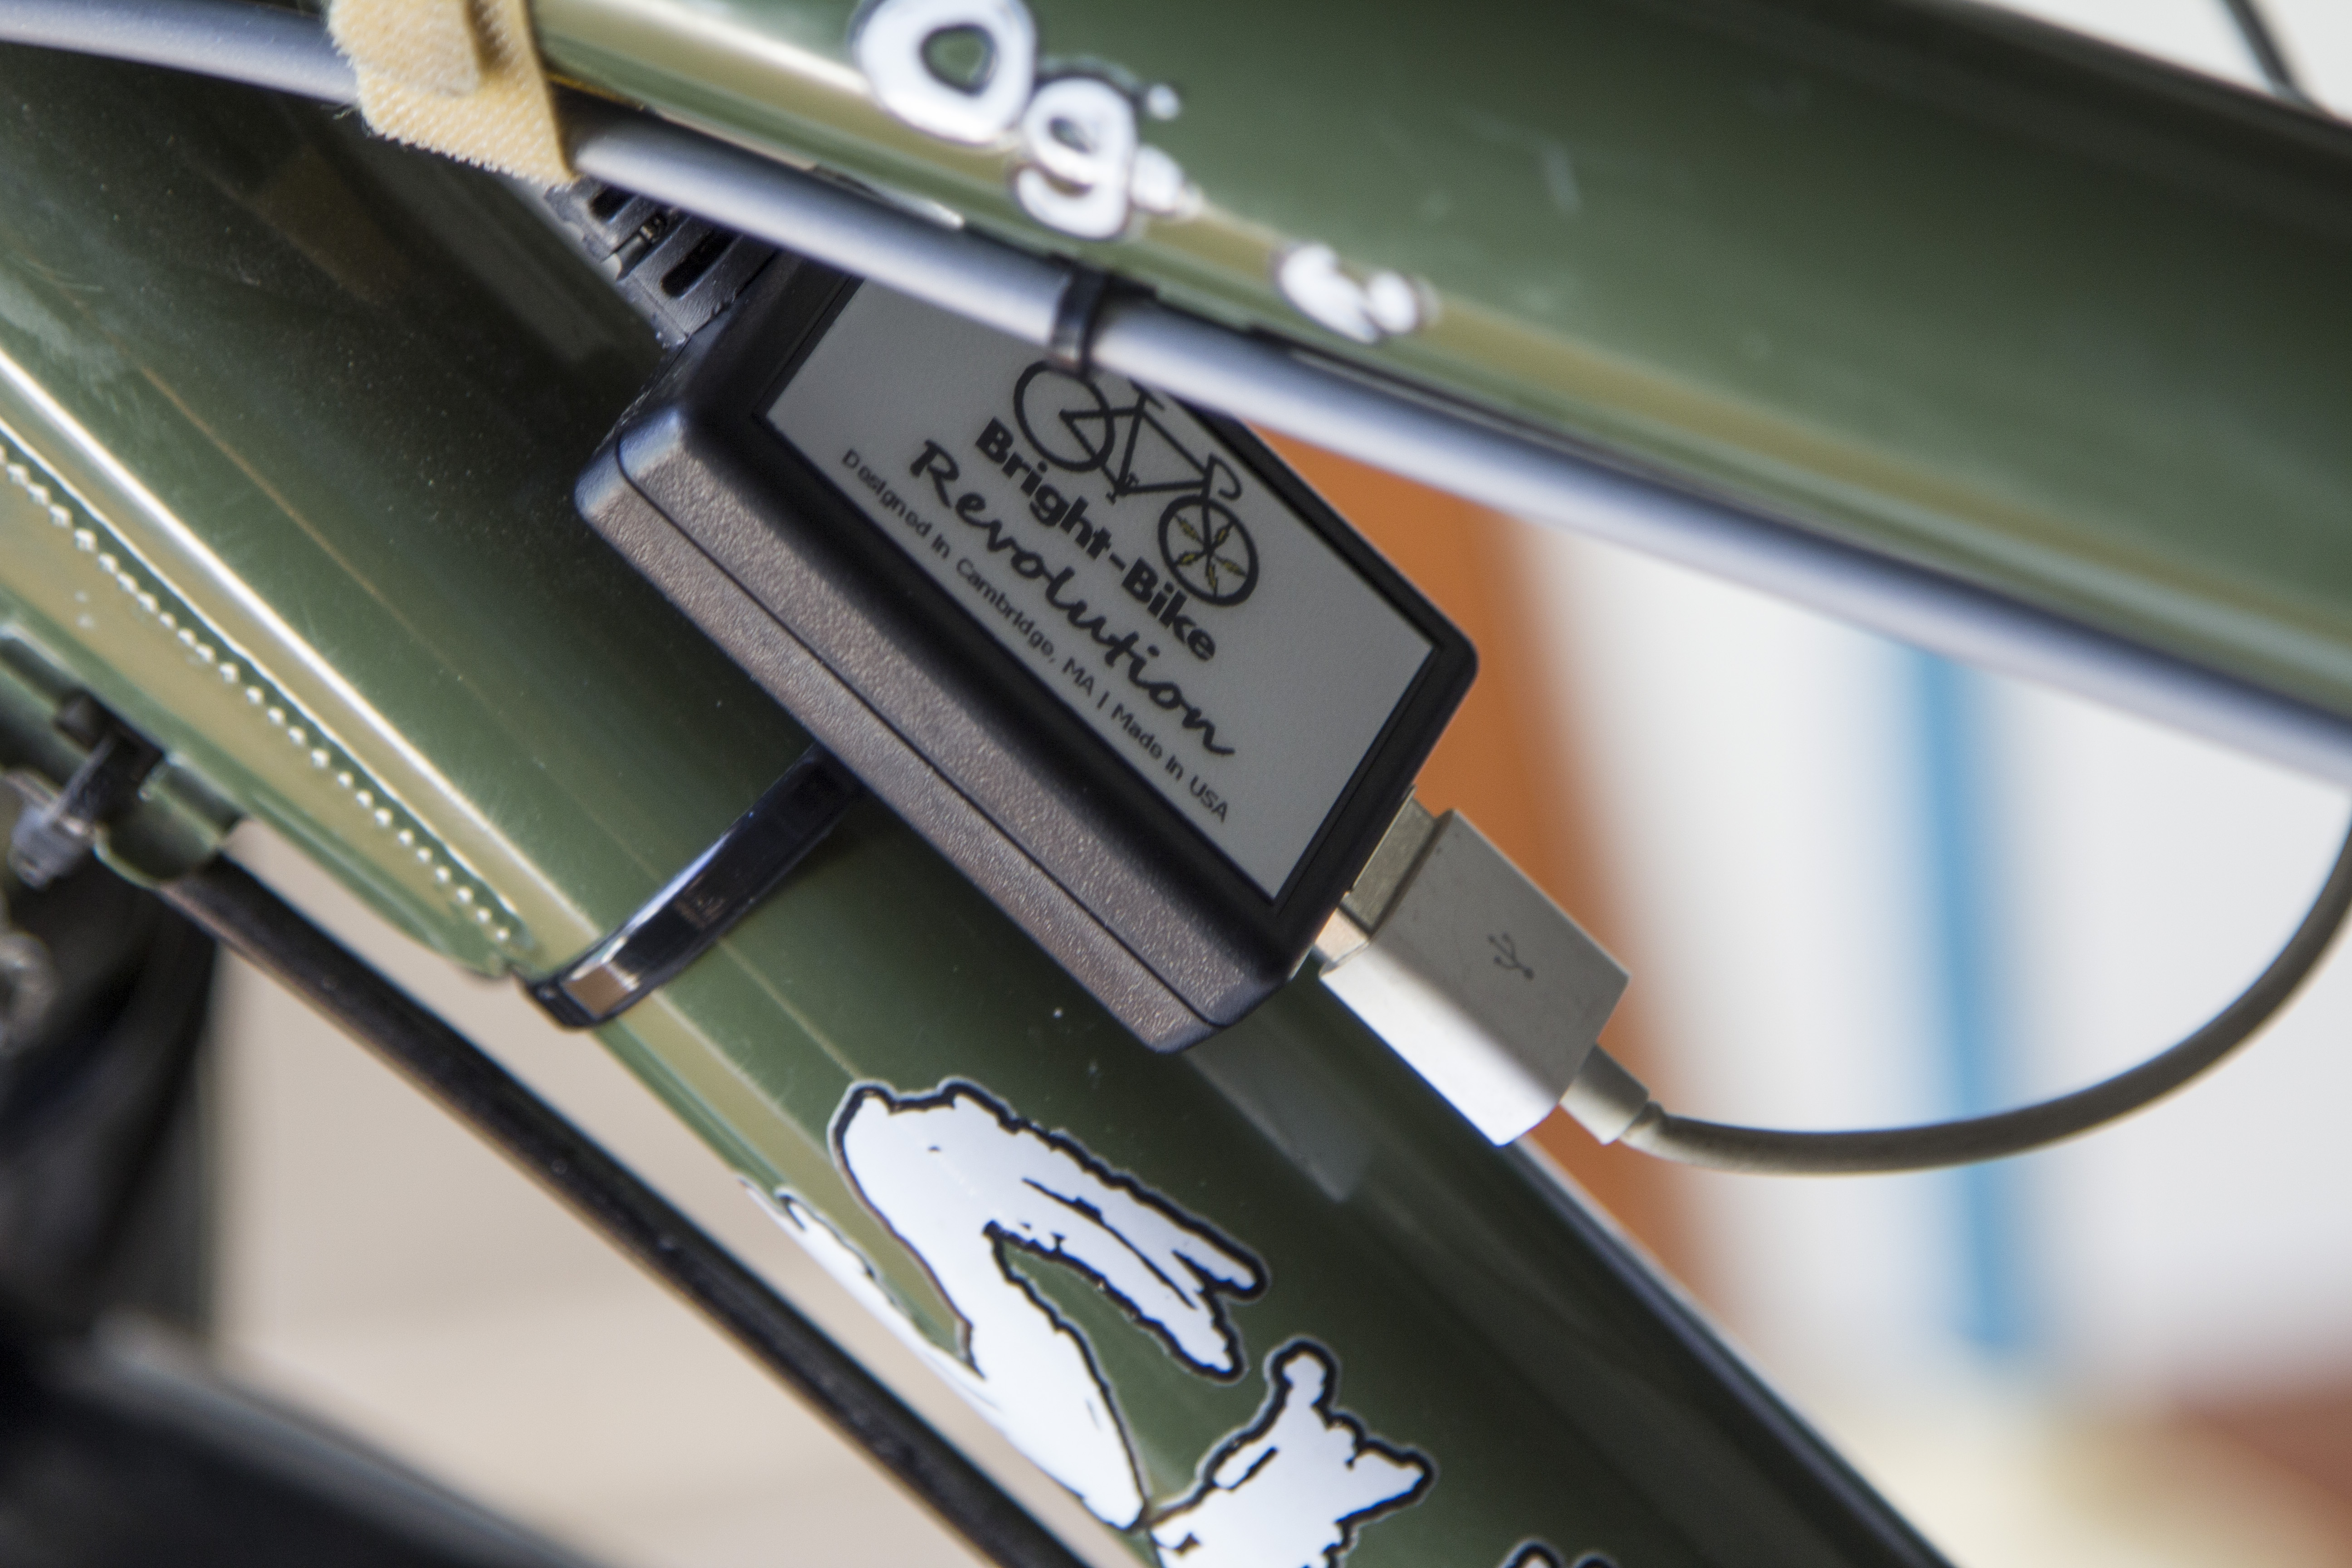
I begins with an IRD, disc only, 36 hole, 3 watt, 6 volt front generator hub, that I have laced to a Veloicity Chukker rim. The hub also features a clutch that can be turned to switch the unit off when it is not needed, extending it’s life, I hope.  In order to get 5 volt, 4.5 watt power from this unit, I purchased a german product called “The Plug II”. This adapter is designed to be installed in your head tube and the unit sits on top of your stem. To me, this is a piece of over engineered, overpriced, gadgetry. But I need one to do this, so I bought one and modified it to suit my needs. I didn’t want the unit permanently installed on my bike as it makes the whole front end of my ride even more complex than it already is, so I built an enclosure for the electronics and mounted the Plug unit to the end. I accomplished this utilizing copper and PVC parts from the local hardware store and mounted to my front rack with velcro straps, for a portable, bombproof USB charging unit. The unit then plugs into the IRD hub.

IMG_7272

IMG_7268

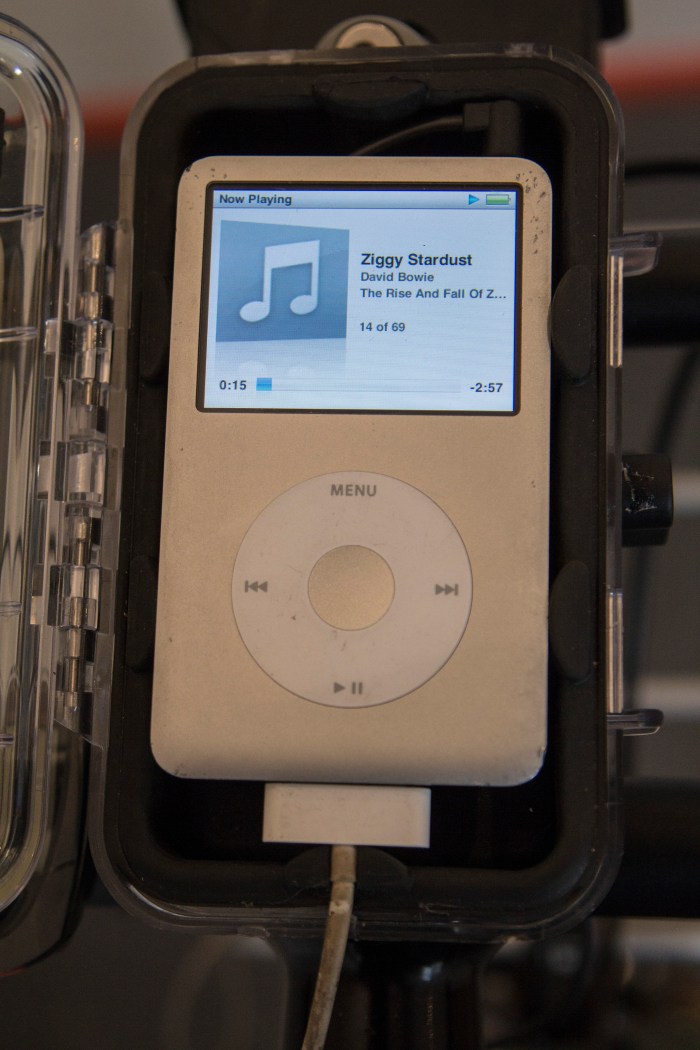
For my ipod, I have a Pelican case that, again has been modified to suit.  I mounted an aluminum plate to the back, drilled a small USB cable hole in the appropriate spot, and hose clamped it to the fake stem mount that I also made in order to accommodate the mounting of an Ortlieb handlebar bag to a Jeff Jone Loop Bar.

IMG_7267

IMG_7271

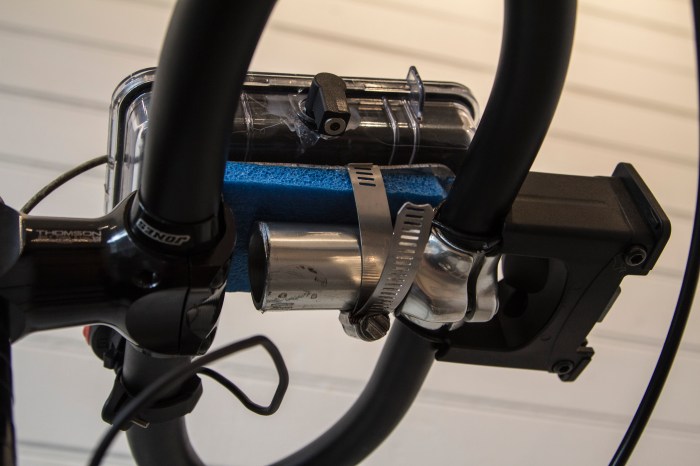
The Ortlieb requires utilizing the bar AND the stem for it’s rock solid, proprietary, mounting scheme. But, one cannot do this with a Jeff Jone Loop Bar, because it has 2 crossbars.  By cutting a stem in half, and using shims for the diameter, I was able to mount the bag to the most excellent Jones Bar. I have utilized other scenarios in the past, such as a second stem below they main stem, but this is sleeker, cleaner, and tricker, for sure!

IMG_7273

IMG_7269

IMG_7274

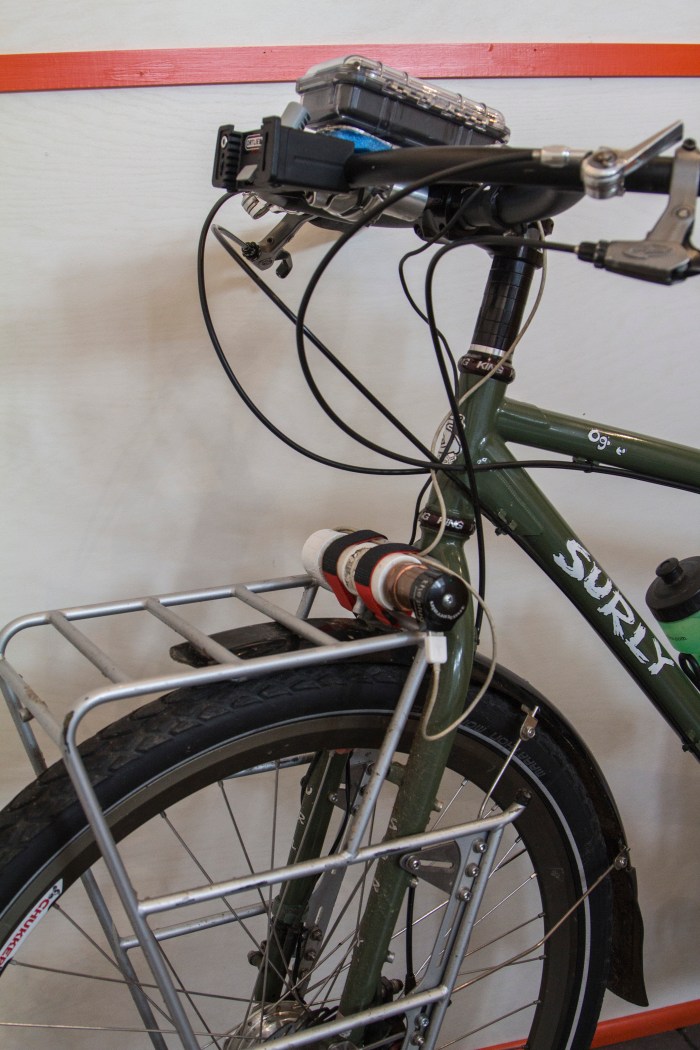
Now, my ipod, etc, are always plugged in and as long as I am in motion, they are charging. The solar panel is still the only way to charge everything else however.

I have some other thoughts on how to possibly rectify this, but that’s for another story.